Some customers have recently been pursuing integrating their MEP Printing Agents with Loftware’s NiceLabel product, when migrating from the legacy Loftware Print Server solution.
While the MEP Printing Agent does not yet have native NiceLabel integration support, a NiceLabel installation can be updated to emulate the legacy LPS listener, allowing the MEP Printing Agent to integrate with NiceLabel 10.2 and later.
This guide touches on most of the basic configuration points for implementing a NiceLabel LPS Trigger for MEP Printing Agent integrations. If you would like any help performing these integration steps, then we recommend working with your Cloud Inventory Account Executive to schedule a consultation OR project with our Infrastructure team.
NiceLabel Printing Using LPS Emulation Trigger
In order to use the current MEP Printing Agent with NiceLabel, you need to implement BOTH a NiceLabel Automation service with an LPS emulation trigger AND a workaround for our PRINTERNUMBER submission method in the NiceLabel installation.
The following information has been validated & documented with:
- NiceLabel Cloud 10.3 (build 21.3.0.10814)
- MEP 9.5.5.10221
- MEP 9.0.12 HF60
Document Purpose
A reference for configuring NiceLabel 10.3 to replace legacy LPS printing, using MEP Printing Agent.
Outline of primary steps required for an LPS to NiceLabel move:
- Install the NiceLabel 10 Service Programs
- Register NiceLabel components installation to the NiceLabel Server
- Configure Windows Spooler printer connections with Loftware drivers
- Implement NiceLabel Automation with LPS trigger & configure to handle PAS files
- Convert LPS labels to NiceLabel format
- Implement NiceLabel label templates for NiceLabel Automation usage
- Implement PRINTERNUMBER workaround for Printing Agent PAS file method
Install the NiceLabel 10 Service Programs
The NiceLabel 10 programs manage printer connections and can implement an LPS print server emulation socket listener. We can implement these at multiple locations on dedicated Windows’ systems or servers.
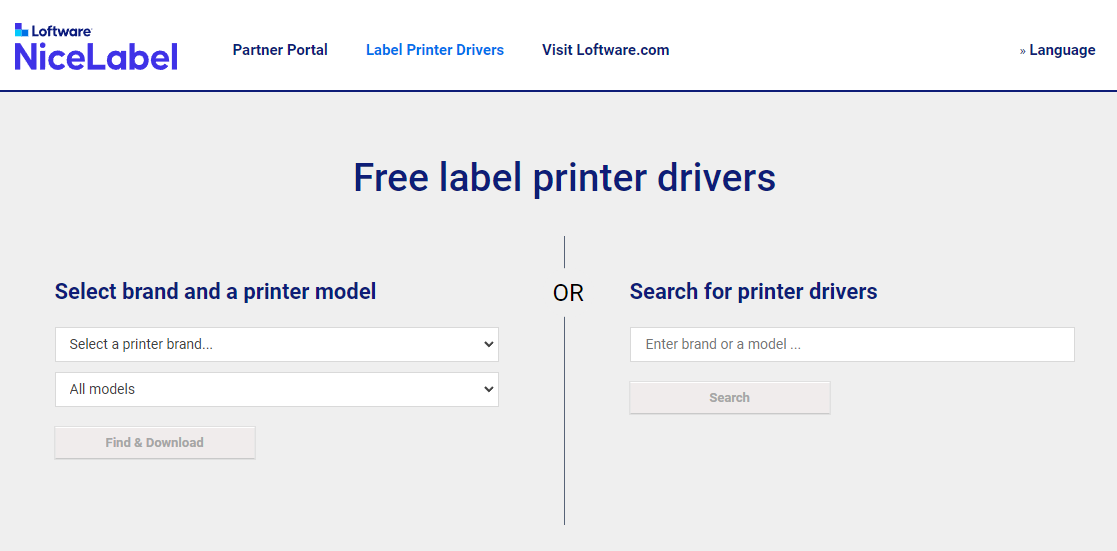
Download the NiceLabel 10 service programs from the link below on the NiceLabel server home page.

This installer loads the primary NiceLabel 10 components to the server:
- NiceLabel Automation Builder 10
- Design and deploy automations for the NiceLabel Automation Service to manage.
- NiceLabel Automation Manager 10
- Monitor, stop, start, and review logs for deployed automations
- NiceLabel Designer 10
- Design label templates for NiceLabel printing.
- Note: Save label templates in the same folder as any deployed automation profiles.
- Design label templates for NiceLabel printing.
- NiceLabel Print 10
- MEP does not use this functionality.

License the NiceLabel 10 Service Programs
After installation, enter either a license key provided by Loftware NiceLabel or log in to the NiceLabel apps with a user account associated to a licensed NiceLabel server. The Loftware NiceLabel team advises you to use an administrator service account for the NiceLabel 10 services instead of a local system account.
Note: A special license component is required to enable the LPS emulation trigger in the NiceLabel Automation Builder.
Any changes to licensing or login sessions requires you to restart the NiceLabel services.
Restarting ‘NiceLabel Proxy Service 10’ initiates a cascading restart of the other two services.

NiceLabel Automation Implementation
The NiceLabel Automation Builder and Manager applications create and manage triggers such as the LPS socket listener emulation that the MEP Printing Agent communicates with.
NiceLabel LPS emulation requires a special NiceLabel license component to enable the LPS trigger option.

Create LPS Emulation Automations
In some cases, a standard .misx NiceLabel Automation file for LPS emulation can be implemented, but when the automation file does not work, perform the following steps build the LPS trigger and PAS job file processing automation:
-
Create an Unstructured Data filter configuration item.
- This example is named “AllData,” but it can be named anything.
- Use the default values for the remaining configurations.
-
Open the Data Filter > Structure tab.
-
Add and name a Field to the Unstructured Data Filter.
- This example uses “AllData” for the field name and the default “Field Start” & “Field End” attributes.
-
Create an LPS trigger configuration item.
- As of NiceLabel 10.3, the LPS trigger only supports listenning on port ‘2723’.
- In NiceLabel 10.5, Loftware added support to customize the port the LPS Trigger listens on.
-
Optional: Name the LPS trigger from Settings > General.
- This example uses “LPS Passthrough.”
-
Select the LPS trigger Variables tab and enable DataFileName from the Internal Variables option.
-
Select the LPS trigger Actions tab, then add Run Command File from the All Actions menu.
-
Set the Run Command File attributes:
- File > File Type: PAS file
- File > File name: DataFileName
- Action Execution and Error Handling > Execution options > Enabled == True
-
Save the Automation Builder profile.
-
Select the Configuration Items tab and select Deploy Configuration.


Manage NiceLabel Automation Deployments
The NiceLabel Automation Manager enables starting, stopping, and logged event reviews for any configured automations. Use this to check interpreted variables for printing agent label requests.


Note a bug currently under investigation: The LPS emulation automation cannot be stopped and started normally after any printing has been performed without restarting the whole NiceLabel Automation Service from Windows Services manager.
Convert Loftware Labels to NiceLabel Format
Note: the Loftware NiceLabel team leads any Loftware Print Server to NiceLabel Print Server migrations for customer label designs. The process is not addressed in this document.
Implement Printers for NiceLabel LPS Emulation
NiceLabel primarily uses Windows Spooler printer profiles that reference the Loftware provided drivers.
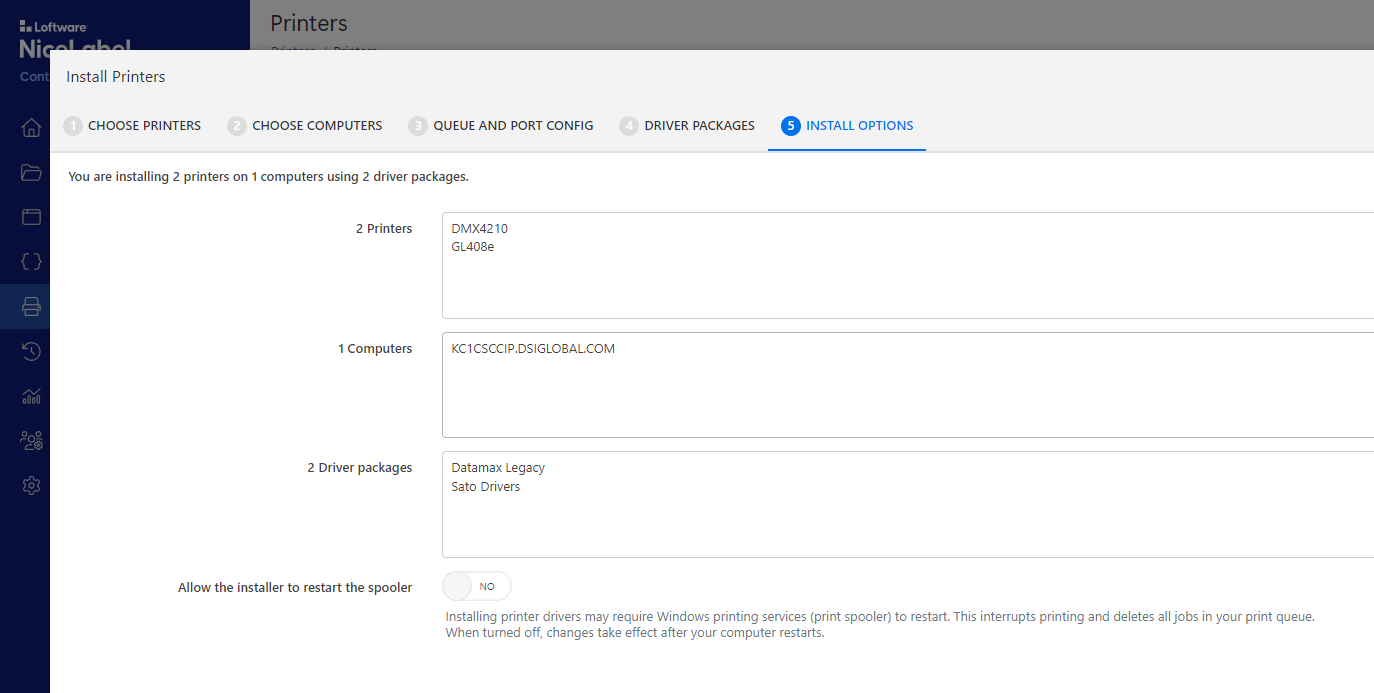
Manage printer installations remotely from the NiceLabel web portal or use the driver packages to add socket printer connections to the Windows Spooler queue.
Configure Printers with Loftware Driver Packages
The Loftware driver installers are straightforward executables available from the NiceLabel downloads site. Use the menus or search function to identify which driver installers you need for each of the printer models you support.
The specific drivers for printer make and models are available via: Download Free Label Printer Drivers | Loftware NiceLabel
More information about managing driver packages is available in the NiceLabel help documents.
Add Printer Driver Packages to NiceLabel Control Center
Both NiceLabel printer manufacturer & model options AND remote printer queue implementations rely on uploading Loftware/NiceLabel driver package executables into the NiceLabel Control Center.

More information about managing Driver Packages is available in the NiceLabel help documents.
Configure Printers from NiceLabel Web Portal
NiceLabel enables you to configure and install Windows printer queues remotely from the NiceLabel Control Center:
- Implement the NiceLabel Proxy Service 10 service.
- Configure the appropriate service account permissions.
- Link the NiceLabel core/cloud Control Center.
Once the steps above are complete, printers can be remotely installed to the servers/machines running the NiceLabel Proxy Service.


More information about remote installing printers is available in the NiceLabel help documents.
Interpret PRINTERNUMBER Definitions Through NiceLabel
Use the NiceLabel LPS Trigger to process the PAS requests, which are otherwise traditionally used for LPS printing.
Current PAS file formatting, generated by the MEP Printing Agent:
*FORMAT,dsitestlabel.lwl
*PRINTERNUMBER,5
*QUANTITY,1
CompanyName,Megadodo Publications
CustomerName,Arthur Dent
CustomerAdd1,155 Country Lane
CustomerAdd2,Cottington, Cottingshire
OrderNumber,E984285
*PRINTLABEL
- *FORMAT:
- NiceLabel label templates use the .nlbl file extension.
- Label names also work with .lwl, .nlbl, or no file extension, for example:
- dsiTestLabel.lwl
- dsiTestLabel.nlbl
- dsiTestLabel
- Map to value passed in FD3N920, ‘PQGS2B’ field insert.
- *PRINTERNUMBER:
- NiceLabel natively supports using PRINTERNAME for device definitions.
- Implementing a ‘printr32.ini’ enables the Printing Agent to use PRINTERNUMBER in NiceLabel.
- Map to value passed in FD3N920, ‘PQRNUM’ field insert.
- ‘PQRNUM’ == ‘Printer ID’
Implement LPS ‘printr32.ini’ config file in the NiceLabel installation:
Due to current Printing Agent limitations, this is required because the Printing Agent is currently hard-coded to use “PRINTERNUMBER” instead of “PRINTERNAME” for the PAS file print request instructions.
-
For example: ‘C:\Program Files\NiceLabel\Nicelabel 10\bin.net\Configuration\printr32.ini’
-
printer<#>=,:,<####>,
- NiceLabel only uses the printer# and ‘system printer name’ sections, but the other sections must be user defined.
-
The ‘printr32.ini’ must be sequentially numbered and does not work when gaps occur in the number sequence.
-
The numbers are zero based in the ‘printr32.ini’.


In NiceLabel Automation Manager version 10.2 or earlier, the ‘printer32.ini’ incorrectly references the printer numbers as if it were a 1-based list, instead of 0 based. This was corrected with the NiceLabel 10.3 release.